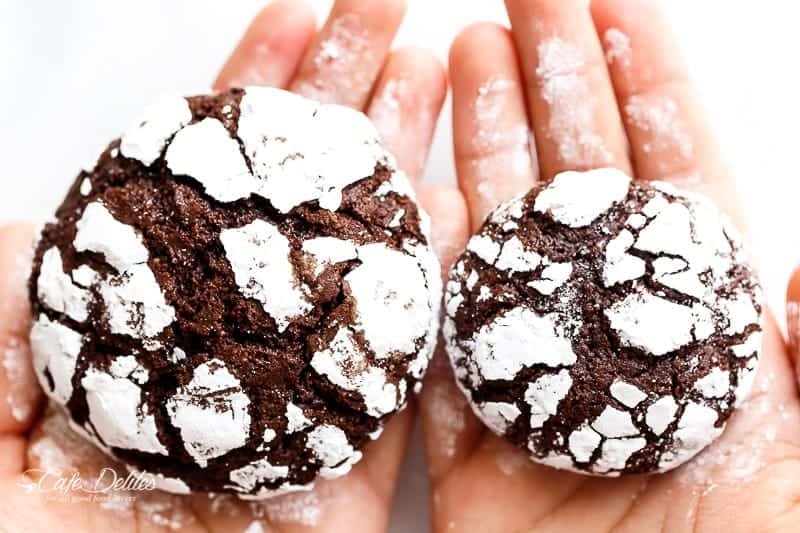
Have you ever wanted a cookie that tastes exactly like a fudgy brownie? That is exactly what you get with chocolate crinkle cookies. These treats are famous for their beautiful “cracked” look and snowy powdered sugar coating. I remember the first time I baked these in my own kitchen. The smell of rich cocoa filled the air, and watching them puff up in the oven was like watching a science experiment. They are the perfect mix of a soft, chewy inside and a slightly crisp outside. Kids love them because they look like little snow-capped mountains, and adults love them because they aren’t too sweet. If you need a reliable dessert for a party or a cozy night in, these cookies are your best friend.
| Feature | Details |
| Recipe Name | Classic Chocolate Crinkle Cookies |
| Prep Time | 15 Minutes |
| Chilling Time | 2 to 4 Hours |
| Bake Time | 10 Minutes |
| Main Flavor | Deep Dutch Cocoa and Vanilla |
| Texture | Fudgy, Soft, and Chewy |
| Difficulty Level | Beginner Friendly |
Why These are the Best Chocolate Crinkle Cookies
What makes chocolate crinkle cookies stand out from a regular chocolate chip cookie? It is all about the texture. Most cookies are crunchy, but these stay soft for days. They use simple pantry staples like flour, sugar, and cocoa powder. I have tested many versions, and the secret is using high-quality cocoa. When you use good ingredients, the chocolate flavor really pops. These cookies are also great because you can make the dough ahead of time. This saves you a lot of stress when you have a busy schedule. They are consistent, reliable, and always disappear from the cooling rack within minutes. Everyone will think you spent hours in the kitchen, but the process is actually quite simple and fun.
Essential Ingredients for Success
To make the perfect chocolate crinkle cookies, you need the right tools and ingredients. You will need all-purpose flour, unsweetened cocoa powder, and baking powder for lift. For the wet ingredients, use granulated sugar, vegetable oil, and large eggs. The oil is a secret trick because it keeps the cookies moist longer than butter does. Do not forget a splash of vanilla extract and a pinch of salt to balance the sweetness. Finally, you need a bowl of granulated sugar and a bowl of powdered sugar for rolling. This double-coating method is a pro tip I learned years ago. It ensures the white sugar doesn’t melt into the dough while baking, giving you those bright white cracks we all love.
Step-by-Step Mixing Instructions
Start by whisking your dry ingredients in a medium bowl so there are no lumps. In a separate large bowl, mix your oil, sugar, and cocoa powder until it looks like dark sand. Add the eggs one at a time, beating well after each one. This helps the chocolate crinkle cookies get that light, airy structure. Slowly fold in the flour mixture until a sticky dough forms. It will look more like a thick cake batter than traditional cookie dough, but don’t worry! That is exactly how it should look at this stage. Use a rubber spatula to scrape the sides of the bowl so every bit of chocolate is included. The dough will be very sticky, which is why the next step is the most important part of the whole process.
The Importance of Chilling the Dough
You might be tempted to bake your chocolate crinkle cookies right away, but patience is key here. You must chill the dough for at least two to four hours. Some bakers even leave it in the fridge overnight. Chilling the dough makes it firm enough to roll into balls without sticking to your hands. It also prevents the cookies from spreading too flat in the hot oven. Cold dough reacts better with the leavening agents, resulting in a thicker, puffier cookie. Whenever I skip this step, my cookies come out thin and greasy. If you want that iconic “crinkle” look, keep that dough cold until the very moment you are ready to roll them in the sugar.
How to Get the Perfect Crinkle Pattern
Creating the signature look of chocolate crinkle cookies is the most rewarding part. Scoop about a tablespoon of dough and roll it into a ball. First, roll it in granulated sugar. This creates a barrier that keeps the moisture inside. Next, roll it heavily in powdered sugar. You want a very thick coat so you can’t see the dark dough underneath. As the cookies bake, they expand and pull the white sugar apart. This reveals the dark chocolate underneath in a beautiful pattern. This “cracking” is where the name comes from. It is a simple technique that yields professional-looking results every single time. Your friends will be amazed at how beautiful they look on a serving platter.
Baking Tips for a Fudgy Center
Baking time is critical for chocolate crinkle cookies. You want to bake them at 350 degrees Fahrenheit for about 10 to 12 minutes. Do not overbake them! When you take them out, they should still look a little soft in the center. They will firm up as they cool on the baking sheet. If you wait until they feel hard in the oven, they will turn out dry and crunchy like a biscuit. We want a brownie-like texture that melts in your mouth. I usually check mine at the 10-minute mark. If the edges are set and the tops have cracked beautifully, they are ready to come out. Let them rest on the warm pan for five minutes before moving them to a wire rack.
Variations to Try at Home
Once you master the basic chocolate crinkle cookies, you can get creative with flavors. You can add a teaspoon of espresso powder to the dough to make the chocolate taste even deeper. Another great idea is to add a half-teaspoon of peppermint extract for a holiday version. Some people like to press a chocolate kiss or a peanut butter cup into the center right after they come out of the oven. You could even swap the vanilla for almond extract for a unique twist. My personal favorite is adding a handful of mini chocolate chips to the dough. This adds little pockets of melted chocolate that make every bite extra special and indulgent for true chocolate lovers.
Storing and Freezing Your Treats
If you have leftovers, which is rare, you need to store your chocolate crinkle cookies properly. Keep them in an airtight container at room temperature for up to five days. To keep them extra soft, you can put a small piece of white bread in the container with them. The cookies will absorb the moisture from the bread. You can also freeze the baked cookies for up to three months. Just make sure they are completely cool before freezing. If you prefer, you can freeze the raw dough balls (before rolling in sugar). When you are ready to bake, just let them thaw slightly, roll them in sugar, and pop them in the oven for a fresh-baked snack.
Perfect Occasions for These Cookies
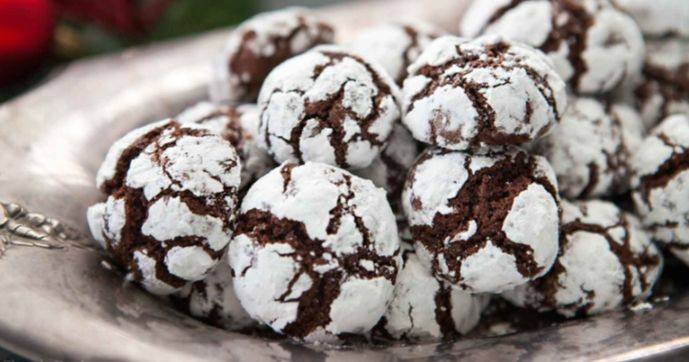
There is never a bad time for chocolate crinkle cookies. They are a staple at Christmas cookie exchanges because they look so festive and snowy. However, they are also wonderful for school bake sales, birthday parties, or as a gift for a neighbor. Because they are sturdy enough to be packed in a box, they are great for shipping to loved ones who live far away. I often make a double batch during the holidays because they are always the first ones to disappear. Their striking black-and-white appearance makes any dessert table look more elegant. Whether it is a formal event or a casual snack, these cookies always bring a smile to everyone’s face.
Final Thoughts
Baking chocolate crinkle cookies is a journey that ends in a delicious reward. It teaches you the importance of temperature and patience. Even if you are a new baker, this recipe is very forgiving. The most important things to remember are to chill your dough and not to overbake. If you follow these simple rules, you will have a perfect batch every time. Baking is a wonderful way to relax and share love with your family. These cookies are more than just food; they are a way to create memories in the kitchen. So, grab your apron, turn on some music, and start rolling those dough balls. You are about to make something truly special.
Frequently Asked Questions
1. Why didn’t my cookies crinkle?
Your dough might have been too warm, or you didn’t use enough powdered sugar. Make sure to chill the dough thoroughly and use the granulated sugar coating first to help the powdered sugar stay put and crack properly.
2. Can I use butter instead of oil?
Yes, you can use softened butter, but the texture will be slightly different. Oil makes the chocolate crinkle cookies more fudgy and moist, while butter makes them a bit more cake-like and adds a rich buttery flavor.
3. My powdered sugar melted. What happened?
This usually happens if the dough is too wet or if you didn’t use the “double-roll” method. Rolling the dough in granulated sugar first creates a dry surface that prevents the powdered sugar from dissolving into the dough.
4. How do I know when they are done?
The edges should be firm to the touch, but the center should still look slightly soft and underdone. They will continue to cook and set as they cool on the baking sheet for a few minutes.
5. Can I make these gluten-free?
Yes! You can substitute the all-purpose flour with a high-quality 1:1 gluten-free flour blend. The texture may vary slightly, but they will still be delicious and have that classic crinkle look.
6. Why is my dough so sticky?
This dough is naturally very sticky because of the high sugar and cocoa content. This is why chilling is mandatory. If it is still too sticky after chilling, try dusting your hands with a little cocoa powder before rolling.